Tuesday 29 May 2012

Creating a Glass on Cinema 4D


  • This was quite a complicated process! :/ 
  • I used the Bezier Spline Drawing Tool on Front View Mode (Not Perspective View).
  • I sketched out half a glass, starting with the base of the cup at XY 0. It was quite hard to perfect, but luckily the points could be repositioned with the Move Tool.
  • Then I selected the Lathe NURB Object, and in the Object Manager I placed the Spline into the Lathe NURB, this changed the 2D Spline in a 3D Object. 
  • Next I added a Floor Object from the Scene Menu, and repositoned the Glass above the Floor Object with the Move Tool. 
  • To make the glass appear smoother when rendered I increased the Lathe NURB Subdivisions (number of Polygons its made from) to 50 (in the Attributes Manager). 
  • To make the Glass Material I deselected Colour Setting and selected Transparency Setting where I applied a Colour, 50% Brightness and 1.5 Refraction
  • I also selected the Reflection Setting and applied a 25% Brightness
  • And Specular Setting with a Plastic Mode and Width of 27%.
  • I added this material to the Glass Object and a Checkerboard Material to the Floor Object. 
  • To finish I added 2 Omni Light Objects with a 50% Brightness and Soft Shadows instead of one light with 150% Brightness as it caused too much dark shadows. 

Tuesday 22 May 2012

iPod Movie :)


  • I made this animation/movie on Cinema 4D.
  • Before starting I changed the iPod Screen by replacing it with The Scripts Album. 
  • I added a Circle Path/Spline & a Target Camera.
  • I resized and repositioned my Circle, then selected the Camera and Aligned it To Spline.
  • I then checked the view through the camera to see what view I would get in the animation. 
  • Before starting the animation I changed the frames to 150F so the movie would be 5 seconds long. 
  • At 0F I changed the Position to 0%, I selected Animation & Added Keyframe, then at 150F I changed the Position to 100% and added another Keyframe.

Once finished I Rendered the Animation, and made sure its format was QuickTime Movie. 

Tuesday 15 May 2012

Modelling an iPod using Cinema 4D

In todays session, I made an iPod using Cinema 4D and a bit of Photoshop. 

To start, I added a Cube, and changed the Size and Fillet of the Cube to form the base shape of an iPod.
I then added a Plane Object to form the Screen of the iPod, I also added a Tube Object to form the Wheel of the iPod. 
I resized and repositioned both objects onto the base.
I selected all of the objects and grouped them together into one by selecting Group Objects.

I then created a surface for the iPod to rest on by adding another Plane Object. and resized it to 1000m x 1000m.

On Materials Manager, I created 4 new materials:
One Purple material, for the iPod colour.
One Black material, for the floor.
One textured material where I Uploaded a picture of the iPod Wheel.
One textured material where I Uploaded a picture of the iPod Menu.
Each Material had a Reflection of 20%.

I changed the image of the iPod Menu and added Katy Perry's Single, [she is one of my favourite singers :)] on Photoshop. I did this by cropping the image of Katy Perry's album (to 113px & 168px) and pasting it onto the iPod Menu Image, replacing the previous album. 

I placed each material onto my objects. I then added a Light Object with an Intensity/Brightness of 125% and repositioned it.


First iPod.

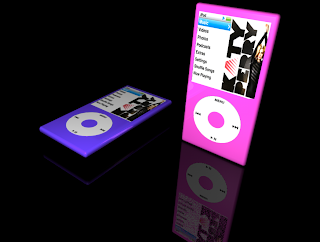
2 iPods. I copy and pasted my original image then rotated and repositioned it. I also changed its colour.

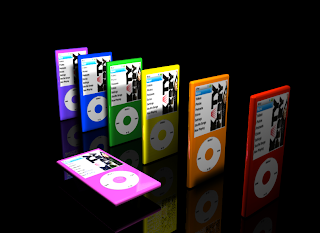
I copy and pasted many versions so I could added more colours. I also added a second light as due to the iPods being very close together, they cast too much shadow. Both lights were too bight so I changed their Intensity to 100%.

Different view.

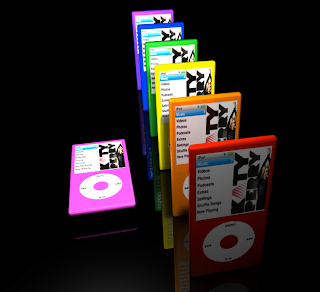
More Repositioning and Rotating.

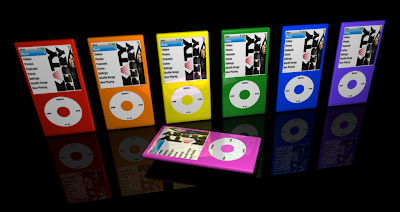
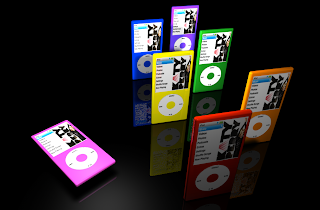
Repositioned facing forward.